Restricting Workspaces to Docker Networks
Workspaces allows the administrator to restrict certain Docker workspace images to only provision on specified custom docker networks. This may be useful if there is a need to use specialized networking such as macvlan/ipvlan or Bridged Network Source NAT. But, it is also useful to provision sessions on groups of Agents to achieve a more simple multi-enclave architecture similar to what can be accomplished with the use of multiple Deployment Zones or with Agents that have certain characteristics (e.g specialized hardware) that are helpful to be grouped and associated with certain workspace images.
In this guide we will demonstrate how to:
Create custom docker networks on Agents
Configure an image to use one or more custom networks
Allow the user to select a network at runtime
Architecture
For this example, we are using in multi-server deployment, with a single webapp, and 4 Agents, each in different enclaves.
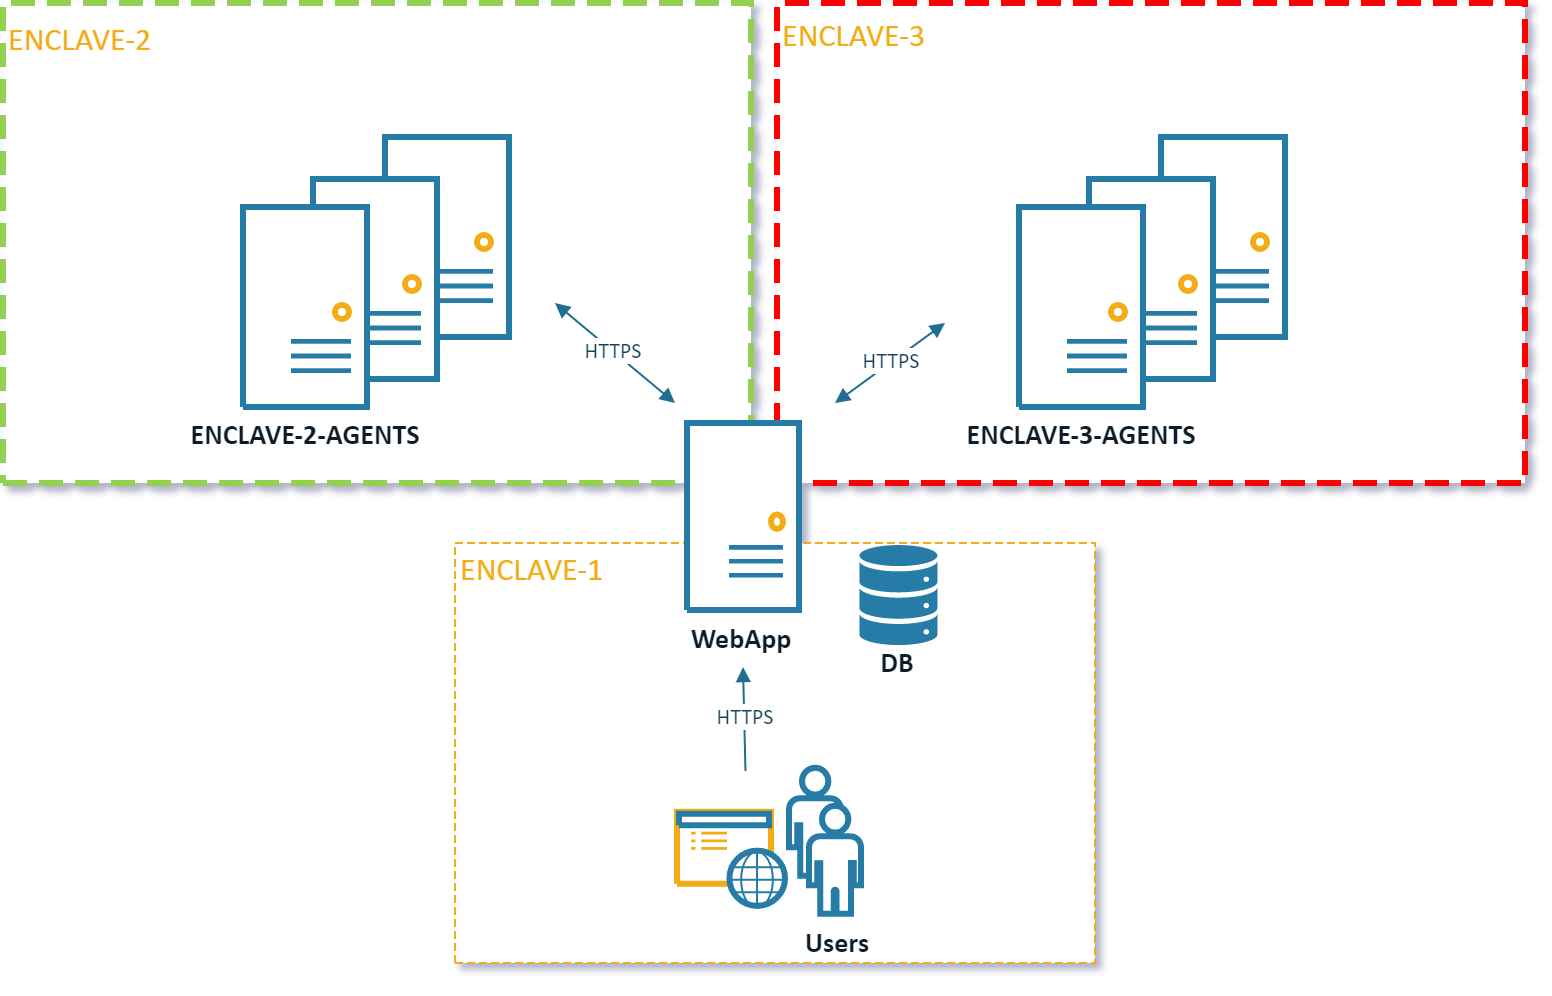
Multi Server Network Architecture
Creating Custom Networks
Workspaces installs a customer bridged docker network named kasm_default_network. By default, all sessions are created
on this network. For this example, we will create an additional custom bridged docker network that represents the target
enclave.
SSH to the desired Agent.
Create a custom docker network.
sudo docker network create z_enclave_2
Note
The docker network names used in this example are intentionally prefixed with z_ . Due to a quirk
docker will choose the default route for the container based on the name of the docker network ordered
alphabetically. We name these custom networks accordingly so that they won’t cause interruptions with the Kasm
service containers or user workflow.
Repeat this step for each Agent. In our example, creating the
z_enclave_2network on all the Agents in enclave 2 andz_enclave_3on all the Agents in enclave 3.
Workspace Configuration
Log into the Workspaces UI as an admin.
Select Workspaces -> Workspaces.
Click Edit next to the desired Workspace from the arrow menu (e.g Chrome).
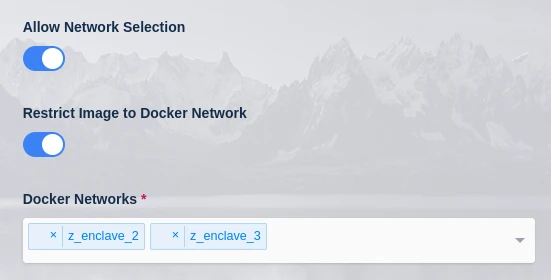
Check Restrict Image to Docker Network and add the custom networks (e.g
z_enclave_2andz_enclave_3). Note. Custom networks will appear in this list a few minutes after they are created on an active Agent.Check Allow Network Selection. This will allow the user to choose from the listed networks when they launch a session.
Workspace Configuration
Click Save.
Launching the Workspace
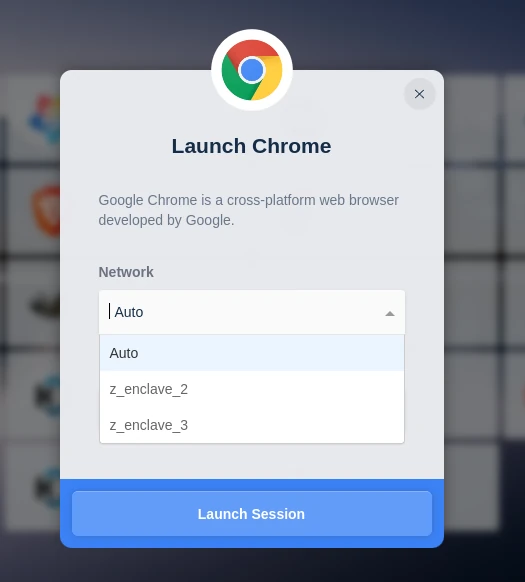
From the Workspaces launcher, click on the previously modified Workspace. A dropdown will appear with a list of the networks defined.
Select the desired network and launch the session. Selecting Auto will provision the session on any Agent with one of the previously specified networks.
Network Selection